Release Notes 06.14.2018
1) New Sync Models
We have extended FrontSpin’s Sync to SFDC options. Now an Admin can decide which option to go with:
a) FrontSpin Admin Authentication only (current sync type).
b) User Sync — Each user authenticates with his/her own SFDC credentials.
Option a) This is the standard way FrontSpin has been using to handle the SFDC sync: all changes on lead/contact/account/opportunity/task objects will be logged through the Admin user that FrontSpin is linked to SFDC with – Created By/Last Modified By fields on these objects will show Admin’s name. A Task’s Assigned To field would be filled with the user who completed the task.
We have also made improvements to this sync model such that when a FrontSpin user does not have a SFDC account, all updates including tasks will be logged to SFDC using the Admin’s name (including the Assigned To field on Tasks).
This allows FrontSpin to enable a one-to-many integration type (one SFDC User to many FrontSpin users).
In order to track more data in a one-to-many sync scenario, we have added additional Advanced Mapping Fields that could be added in SFDC on each object (Created by/Last Modified By that FrontSpin), which will log to SFDC the first and last name of the user, to to help with reporting in one-to-many model:
Option b) In this model of the sync, each user will need to authenticate with his/her own SFDC credentials. Users won’t be able to use the platform until they authenticate.
In this sync model, Last Modified By and Created By fields on all objects will be logged to SFDC under the user who performed the action.
Users will also be notified on the errors in cases where SFDC rejects the update due to some reason.
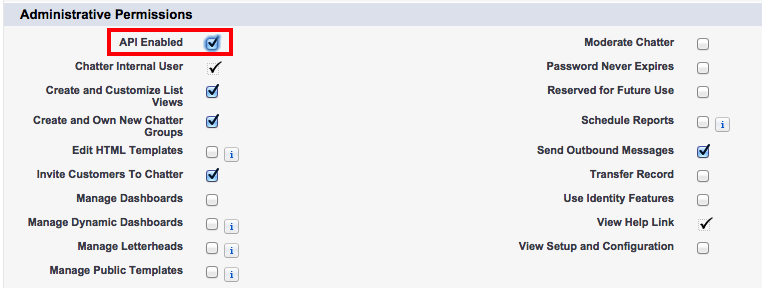
For model b) each user has to have enough permissions in SFDC to log/edit tasks and must have API access enabled in the profile.
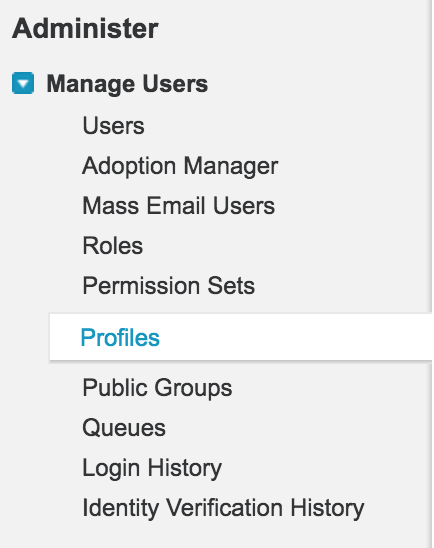
1. Click Setup

3. Click Edit against the specific Profile.

4. Scroll down to Administrative Permissions and check the API Enabled box.

5. Click Save.

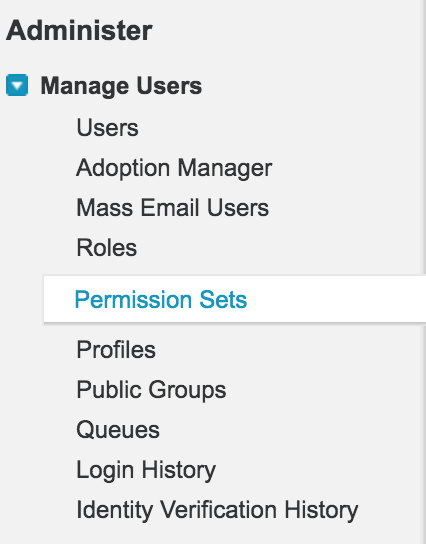
3. Select the specific Permission Set.

4. Click System > System Permissions > Edit
5. Check the API Enabled box.

6. Click Save.
